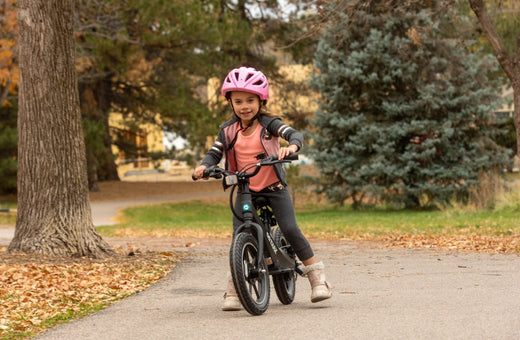
Teaching your child to ride a bike is a rite of passage, but it doesn’t have to involve tears, scraped knees, or long, frustrating afternoons with training wheels.
There's a simpler, faster way to help your child master this life skill. This step-by-step method focuses on balance and confidence rather than relying on outdated techniques. Explore GOTRAX electric bike, making cycling easier and more fun!
Why Skip Training Wheels?
Training wheels might seem like the obvious choice, but they often delay progress. Kids using training wheels don’t get to practice balance—the most important part of riding a bike. Instead, they learn to rely on the extra support, making the transition to riding on two wheels more challenging.
This method lets kids build their confidence gradually. It emphasizes balance and movement from the start, helping them feel more in control. Plus, it’s easier on parents since you’re not constantly holding them up or running alongside the bike.
What You'll Need
Before getting started, make sure you have the following:
- Helping your child choose the right bike
- A wrench or tool to remove the pedals
- Helmet (non-negotiable for safety)
- Comfortable, close-toed shoes for your child
- A flat, open space to practice, such as a parking lot or school blacktop
Proper preparation sets the stage for a smoother learning experience.
Step 1: Prepping the Bike

Prepare a suitable bicycle and make sure the size of the bicycle is suitable for your child. At the same time, you can operate the bicycle in the following ways:
1. Remove the Pedals

Using a wrench, take off both pedals from your child’s bike. Without pedals, the bike functions like a balanced bike, allowing your child to focus solely on steering and stability. For detailed guidance, check out How to change bike pedals.
2. Lower the Seat
Lower the seat until your child can place both feet flat on the ground while seated. This ensures they feel secure and in control of the bike.
3. Don’t Worry About the Chain
With the pedals removed, the chain may appear loose. That’s fine—it won’t affect anything during this training process.
Step 2: The Walking Phase
At first, your child just walks the bike back and forth. This helps them get used to the bike’s weight and learn how it moves. It’s a simple way to build confidence without overwhelming them.

1. How to Practice?
Encourage your child to sit on the bike and walk it forward and back in a straight line. They should get comfortable moving the bike without wobbling. This part may take some time, so let them practice until they feel confident.
2. Your Role
Stay nearby but don’t hover. Offer encouragement and focus on small wins like walking in a straight line. Keep things lighthearted to eliminate any pressure.
Step 3: Introducing Bunny Hops
Bunny hops are the next step after walking. Your child pushes off with both feet at the same time, allowing them to coast for brief moments without their feet touching the ground. This is their first taste of balancing on two wheels.

1. How to Encourage Longer Bunny Hops?
Once they’ve mastered short bunny hops, challenge them to go a bit farther with each push. These longer stretches of coasting get them used to balancing for several feet at a time.
2. Best Place to Practice
A flat, open area works best here. Avoid hills, which can make it harder for your child to control speed and balance. A smooth surface like a schoolyard or a quiet parking lot is ideal.
Step 4: Mastering the Glide
Gliding is an extension of bunny hops. Instead of quick, choppy steps, your child pushes off and coasts for longer distances, lifting their feet off the ground completely.
1. Building Confidence
This step is where many kids start to feel like they’re really riding. Celebrate their progress and encourage them to keep trying, even if they only glide a short distance at first.
2. Adjusting to Their Comfort Level
If your child seems hesitant, remind them of how much they’ve already accomplished. It’s okay if they take smaller steps or shorter glides—encourage them at their own pace.
Step 5: Putting the Pedals Back On
Reattach the pedals and adjust the seat. Raise it slightly so only their toes can reach the ground. This keeps their knees from rising too high while pedaling, making riding more comfortable.

1. Getting Started
The first few attempts might be wobbly. Encourage your child to begin with a small bunny hop or glide before transitioning to pedaling. Starting with some forward movement makes it easier to find their balance and control.
2. Don’t Rush
This final stage might take some trial and error. Be patient and remember that every child learns at their own pace.
Encouragement Goes a Long Way
1. Give Them a Pep Talk

Before they try pedaling, remind them of their progress. Point out how much they’ve improved since starting and let them know you believe in their ability to ride.
2. Make It Fun
Keep things lighthearted! Turn gliding into a game or race to a nearby landmark. A positive atmosphere reduces stress and helps your child enjoy the process.
3. Be Patient
Some kids pick this up quickly, while others need more time. Either way, stick with it. Celebrate every small success and stay encouraging.
Troubleshooting Common Problems
1. Balancing Issues
If your child struggles with balance, go back to walking or bunny hops. More practice here will build their skills and confidence.
2. Fear of Gliding
Some kids feel nervous about lifting their feet off the ground. Start with short glides and gradually increase the distance. Reassure them that it’s okay to take baby steps.
3. Struggles With Pedaling
If balancing and pedaling at the same time feels tricky, revisit longer glides without pedals. With time, they’ll gain the coordination needed to pedal smoothly.
Practice Locations Matter
Choose the right location. A flat, open space with no distractions is usually best. Avoid roads or uneven terrain as this may make the practice more difficult.
Practice at a quiet time of day to minimize distractions and give your child enough space to focus. Early mornings or after school are good options.
Wrapping It Up
Learning to ride a bike without training wheels is not just about pedaling—it’s about building balance, confidence, and independence. With this approach, you and your child can make the process easier and more enjoyable.
Whether it’s a regular bike or an electric bike, take it slow, keep it fun, and celebrate every milestone along the way. Whether it takes an hour or a few days, the reward of watching them ride on their own is worth it. Now, grab your tools, head to that empty parking lot, and get started—it’s time to ride!
Click to learn: How to Measure a Bike Frame?